AMRAAM AIM-120C 4"
AMRAAM AIM-120C 4"
AMRAAM AIM-120C 4"
AMRAAM AIM-120C 4"
AMRAAM AIM-120C 4"

AMRAAM AIM-120C 4"

LC-AIM120C4

Regular price $157.29
/

Only -39 items in stock!

The AIM-120C is a light weight, high power performer. The LOC-N-MOUNT 54mm is great for Level 1/2 motors if your field can handle it. This kit flies great on a variety of H to K motors. And the LOC-N-RING 29/38mm adaptors will bolt right up.

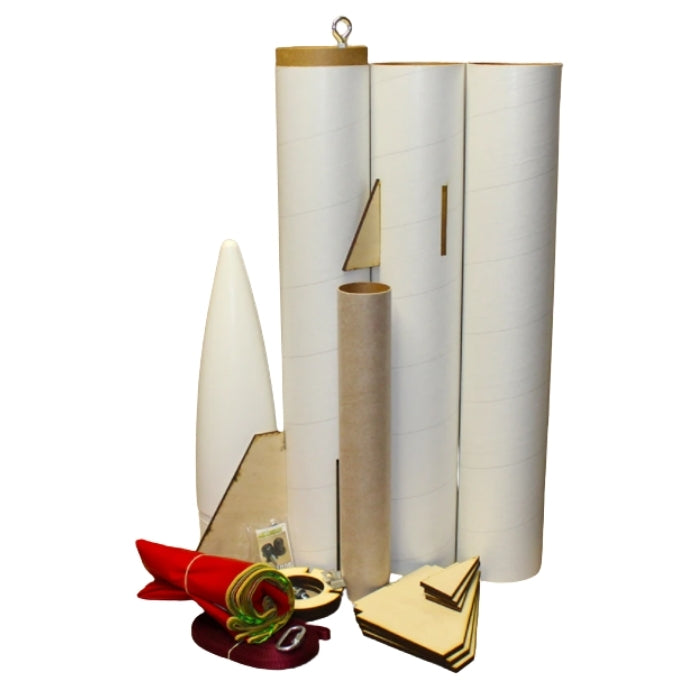
The AMRAAM features: 23″ Booster Section, 23" Booster Extension and 23" Payload, 2 couplers and a baffle system allowing the kit to be built a variety of ways. Add an optional 3.9" Electronics Bay for dual deployment flights!

RockSim

DESCRIPTION

Complexity: Advanced
Diameter: 4.00″
Height: 81″
Weight: 4lb
Motor Mount: 54MM
Parachute Size: 50″ Ripstop Nylon
Shock Cord Type: 20′ Nylon
Shock Cord Mount: Eye Bolt / Baffle
Fin Thickness: 1/4″
Ring Thickness: 1/4″
1010 Rail Guides 
Instructions: No - LOC Custom kits allow you to build and bash. Visit our How-To page for tips and tricks
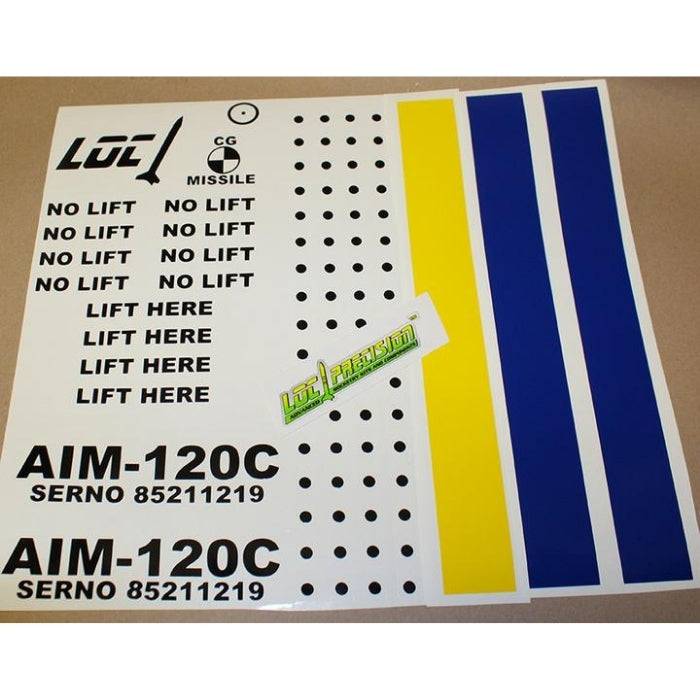
Vinyl Decal: Yes


Customer Reviews

Based on 2 reviews
100%
(2)
0%
(0)
0%
(0)
0%
(0)
0%
(0)
S
Steven Ragan
Yep, I Built Her!

I built as specified. Nothing special. I'll use her for my L2 cert, of course with a Jolly Logic chute release as I do not like to track my GPS signal for over a mile from touchdown point. Great kit! I'd post a pic of her but the website doesn't have that option. PS... build the can outside, then insert... much more stronger!

A
Aaron Stanley

Brief:
This is a scale model sport rocket kit of the AIM-120 Advanced Medium-Range Air-To-Air Missile, or AMRAAM. This rocket is a great overall sports flier or perfect for an L2 certification attempt.

Construction:
This rocket kits comes very well packaged in a box and not in a standard plastic bag with a header card. Whats in the box? In the box there are three 23 inch long body tube sections (booster, booster extension, and payload section), two couplers, baffle system (two bulkheads, two 4” long 38mm tubes, and coupler), three centerings (using the LOC-N-Ring System), a 14 inch 54mm motor tube, four main fins, four canard fins, a nylon strap shock cord with sewn loops, 4” bulkhead, a 50 inch main parachute, decals, and other miscellaneous hardware (rail buttons, I-bolts, z-clips motor retention set, etc.). A few modifications I did to kit was I added a 4 inch LOC electronics pay, put in a 28 long 54mm motor tube, forth centering, 100’ drogue tether, 12” X-form drogue parachute, 60’ main tether, 90’ X-Form main parachute.

This rocket kit doesn’t include any instructions which I’m personally 100% okay with. With the way this kit is designed using the LOC-N-Ring system is best to build the fin can assembly outside of the rocket and then slide it into the booster tube. I really like this LOC-N-Ring system as it takes out any guess work if your fins are perfect aligned and straight. On the booster section I ditched the short 14 inch long motor tube and stepped up to a 28 inch long motor tube so it would extend into the booster extension tube. This also meant ditching the baffle as well. Using the provided couplers I made a double wall coupler for connecting the booster to the booster extension. I then cut the slots on the booster tube all the way to the end so I could slide the fin can assembly in. This is where adding that forth centering comes into play as I have it epoxied on the motor tube so when epoxying in the double wall coupler it sticks out of the booster exactly four inches. I then epoxy the last centering on to the motor on top of the coupler. The booster extension section is then epoxied to the booster extension to make the whole booster 46 inch long booster section. Next I took the coupler that was provide for the baffle system and I cut it in half to four inches in length and glued it part into booster right behind slots for canards. I glued the canards on using Tite Bond 3 wood glue. To close up the booster where I slotted it all the way to end I took a half inch long piece of coupler tube and epoxied it into place. For the external fillets for main fins and canards I used JB WoodWeld. Instead of using the provide rail buttons to give it a more scale look I used PML Linear rail guides. Now on to the payload section. I ditched the coupler bulkhead assembly and simply added an LOC 4 inch electronics bay to make it duel deployment. I attached the LOC-Av-Bay to the payload section with four 6-32 inch stainless screws. For the breather holes in the av-bay I went with four 1/8” inch holes. For the nosecone I drilled two 1/4” whole in the bottom and ran a piece of 550 cord through as the attachment point.

Overall construction of this rocket was simple and straightforward. Everything fit perfectly together with minimal sanding of parts. I would recommend this kit to someone who has a good knowledge of high power rocketry construction.

Finishing:
I haven’t painted the rocket yet. But finishing will should be straight forward. First will be prepping all the surfaces of the rocket by lightly sanding the whole rocket with 440 grit sand paper and fins with 220 grit. I’ll hit it with probably two to three coats of primer. Color of the rocket will be a light gray with silver fins and white nosecone. Apply the decals and then clear coat.

Flight:
Hasn’t flown yet. For the first flight of this rocket I will likely fly it on an AeroTech DMS K400C.

Recovery:
I did a few upgrades to kit as far as recovery goes. I ditched all the stock recovery parts and bought new ones. For the booster section I’ll be using a 100’ long 9/16” tubular nylon drogue tether with a 12” X-form drogue parachute. For the payload section I’ll be using a a 60’ long 9/16” tubular nylon drogue tether with a 90” X-form main parachute. |

Summary:
Yes I did quite a few modifications and upgrades to this rocket and kind of made it my own. But even if this rocket kit were to be built complete stock I believe it would still be a great scale model sport rocket kit. If you’re someone who has a good knowledge of high power rocketry construction I highly recommend this kit.

Why choose us?

ROCKETRY LEADER SINCE 1985

LOC Precision provides quality rocket kits and components for every skill level. Your one stop shop for anything rocketry.

TESTIMONIALS

★★★★★

Most of my High Power and Mid Power fleet is LOC. I certified all three levels using LOC kits. The quality of the kits & customer service is phenomenal. I would recommend them to everyone.

Peter Waithe
Millbury, MA
★★★★★

I have 16 LOC models love building them and flying them! Jason has turn the company around and made the hobby a lot more fun and really good people. I sincerely thank you LOC

Dennis Jurus
Lancaster, NY

Recently viewed

Customer Reviews

Based on 2 reviews
100%
(2)
0%
(0)
0%
(0)
0%
(0)
0%
(0)
S
Steven Ragan
Yep, I Built Her!

I built as specified. Nothing special. I'll use her for my L2 cert, of course with a Jolly Logic chute release as I do not like to track my GPS signal for over a mile from touchdown point. Great kit! I'd post a pic of her but the website doesn't have that option. PS... build the can outside, then insert... much more stronger!

A
Aaron Stanley

Brief:
This is a scale model sport rocket kit of the AIM-120 Advanced Medium-Range Air-To-Air Missile, or AMRAAM. This rocket is a great overall sports flier or perfect for an L2 certification attempt.

Construction:
This rocket kits comes very well packaged in a box and not in a standard plastic bag with a header card. Whats in the box? In the box there are three 23 inch long body tube sections (booster, booster extension, and payload section), two couplers, baffle system (two bulkheads, two 4” long 38mm tubes, and coupler), three centerings (using the LOC-N-Ring System), a 14 inch 54mm motor tube, four main fins, four canard fins, a nylon strap shock cord with sewn loops, 4” bulkhead, a 50 inch main parachute, decals, and other miscellaneous hardware (rail buttons, I-bolts, z-clips motor retention set, etc.). A few modifications I did to kit was I added a 4 inch LOC electronics pay, put in a 28 long 54mm motor tube, forth centering, 100’ drogue tether, 12” X-form drogue parachute, 60’ main tether, 90’ X-Form main parachute.

This rocket kit doesn’t include any instructions which I’m personally 100% okay with. With the way this kit is designed using the LOC-N-Ring system is best to build the fin can assembly outside of the rocket and then slide it into the booster tube. I really like this LOC-N-Ring system as it takes out any guess work if your fins are perfect aligned and straight. On the booster section I ditched the short 14 inch long motor tube and stepped up to a 28 inch long motor tube so it would extend into the booster extension tube. This also meant ditching the baffle as well. Using the provided couplers I made a double wall coupler for connecting the booster to the booster extension. I then cut the slots on the booster tube all the way to the end so I could slide the fin can assembly in. This is where adding that forth centering comes into play as I have it epoxied on the motor tube so when epoxying in the double wall coupler it sticks out of the booster exactly four inches. I then epoxy the last centering on to the motor on top of the coupler. The booster extension section is then epoxied to the booster extension to make the whole booster 46 inch long booster section. Next I took the coupler that was provide for the baffle system and I cut it in half to four inches in length and glued it part into booster right behind slots for canards. I glued the canards on using Tite Bond 3 wood glue. To close up the booster where I slotted it all the way to end I took a half inch long piece of coupler tube and epoxied it into place. For the external fillets for main fins and canards I used JB WoodWeld. Instead of using the provide rail buttons to give it a more scale look I used PML Linear rail guides. Now on to the payload section. I ditched the coupler bulkhead assembly and simply added an LOC 4 inch electronics bay to make it duel deployment. I attached the LOC-Av-Bay to the payload section with four 6-32 inch stainless screws. For the breather holes in the av-bay I went with four 1/8” inch holes. For the nosecone I drilled two 1/4” whole in the bottom and ran a piece of 550 cord through as the attachment point.

Overall construction of this rocket was simple and straightforward. Everything fit perfectly together with minimal sanding of parts. I would recommend this kit to someone who has a good knowledge of high power rocketry construction.

Finishing:
I haven’t painted the rocket yet. But finishing will should be straight forward. First will be prepping all the surfaces of the rocket by lightly sanding the whole rocket with 440 grit sand paper and fins with 220 grit. I’ll hit it with probably two to three coats of primer. Color of the rocket will be a light gray with silver fins and white nosecone. Apply the decals and then clear coat.

Flight:
Hasn’t flown yet. For the first flight of this rocket I will likely fly it on an AeroTech DMS K400C.

Recovery:
I did a few upgrades to kit as far as recovery goes. I ditched all the stock recovery parts and bought new ones. For the booster section I’ll be using a 100’ long 9/16” tubular nylon drogue tether with a 12” X-form drogue parachute. For the payload section I’ll be using a a 60’ long 9/16” tubular nylon drogue tether with a 90” X-form main parachute. |

Summary:
Yes I did quite a few modifications and upgrades to this rocket and kind of made it my own. But even if this rocket kit were to be built complete stock I believe it would still be a great scale model sport rocket kit. If you’re someone who has a good knowledge of high power rocketry construction I highly recommend this kit.